Installing ThingsPro Edge
Install ThingsPro Edge From an Installer
Download the installer from the official website and install the packages using the dpkg command and with the root privilege.
root@Moxa:~# dpkg -i moxa-thingspro-edge-*.deb
...
**********************************************************
* The installation process ended successfully.
**********************************************************
You can track the progress of the installation using journalctl -u update -f.
When you install ThingsPro Edge for the first time, it will take a lot longer to install all the built-in APPs such as the API service. You can query the progress using:
root@Moxa:~# appman app ls
+---------------+-------------+--------------------------------+---------+
|     NAME      |   VERSION   | STATE (DESIRED STATE)          | HEALTH  |
+---------------+-------------+--------------------------------+---------+
| cloud         | 2.1.0-1013  | ready (ready)                  | good    |
| device        | 2.1.0-3528  | ready (ready)                  | good    |
| edge-web      | 1.9.17-5046 | ready (ready)                  | good    |
| modbusmaster  | 1.3.2-602   | installing (ready) - importing | running |
|               |             | images...0% (3/4)              |         |
| tagservice    | 2.1.0-575   | ready (ready)                  | good    |
+---------------+-------------+--------------------------------+---------+
Install ThingsPro Edge via ThingsPro Proxy
Find the ThingsPro Proxy (TPP) Utility on the official website and install ThingPro Edge using a provisioning plan.
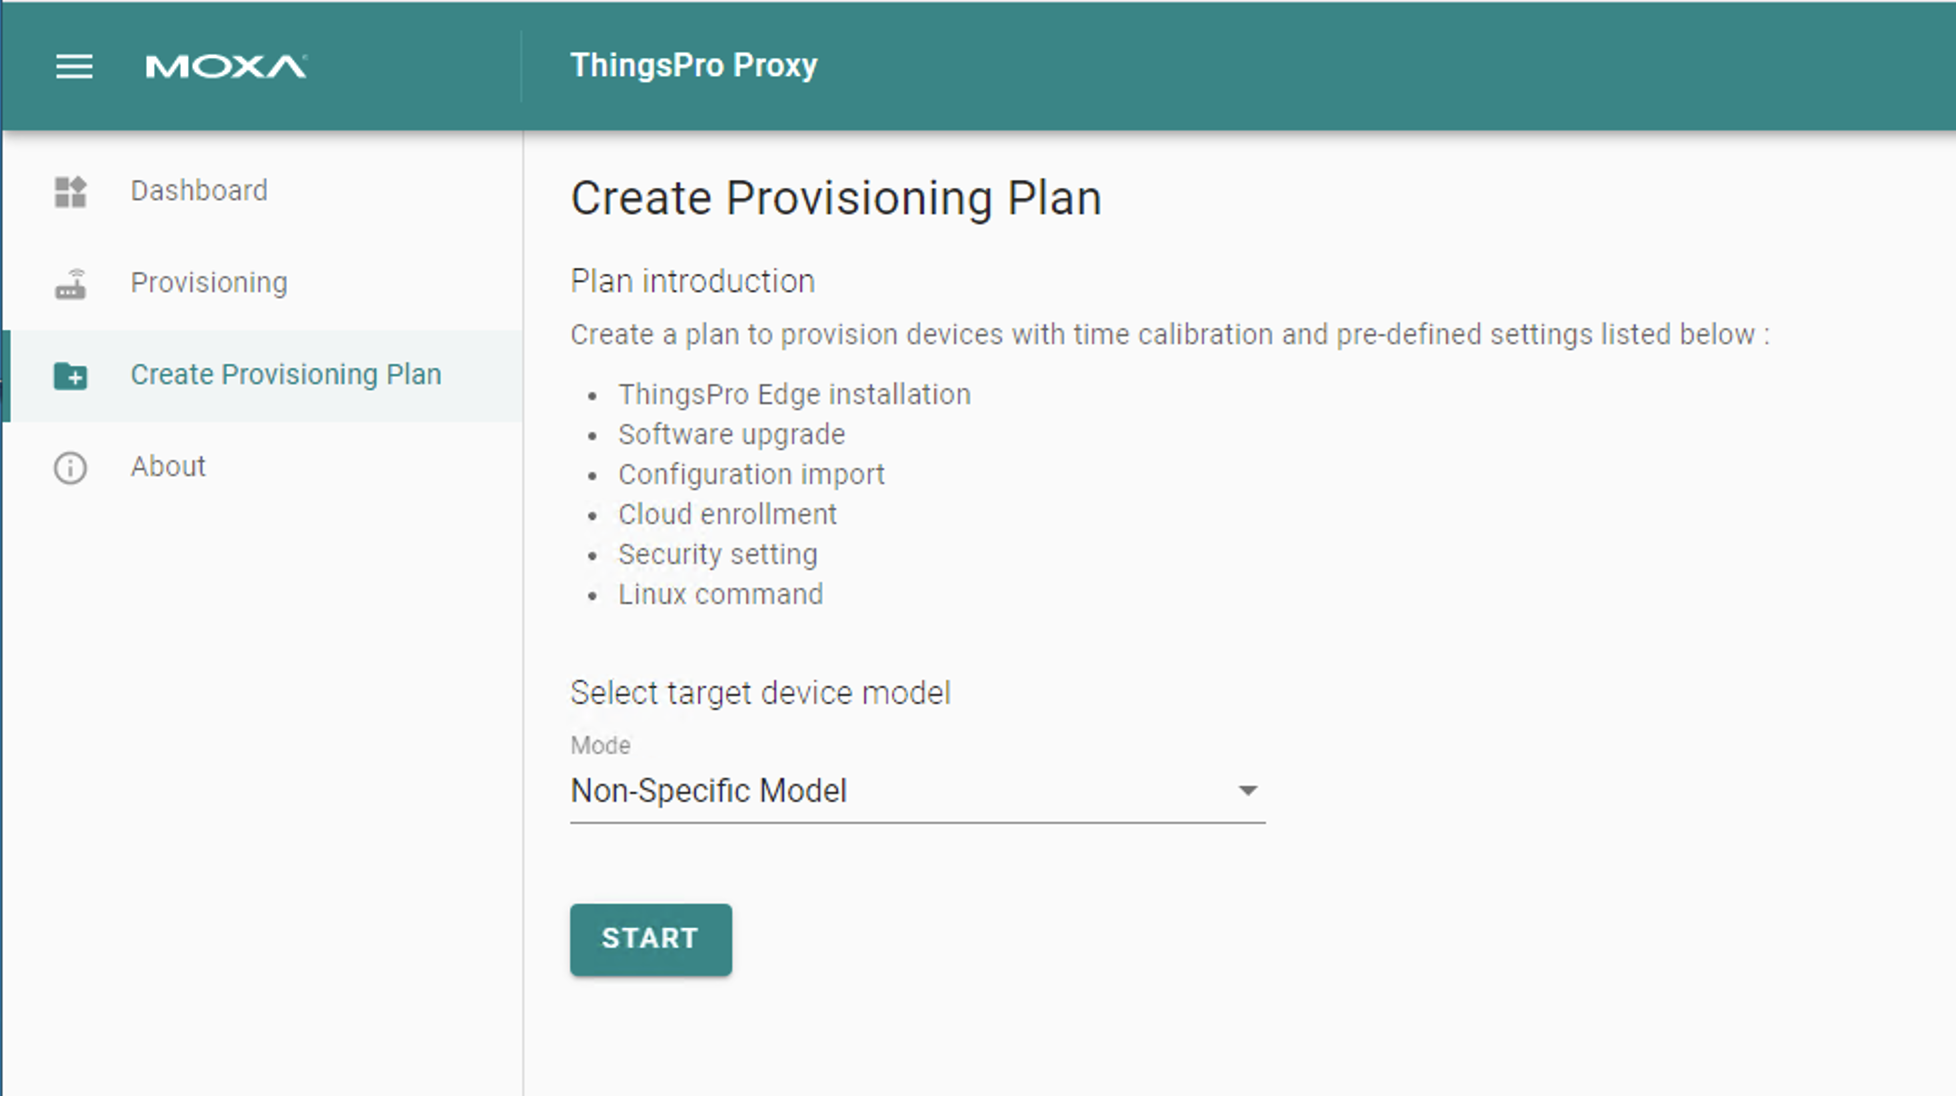
Creating a Provisioning Plan
- In ThingsPro Proxy, click on the Create Provisioning Plan link.
- Specify a target device model and click START. Select Non-Specific Model or Specific Model.
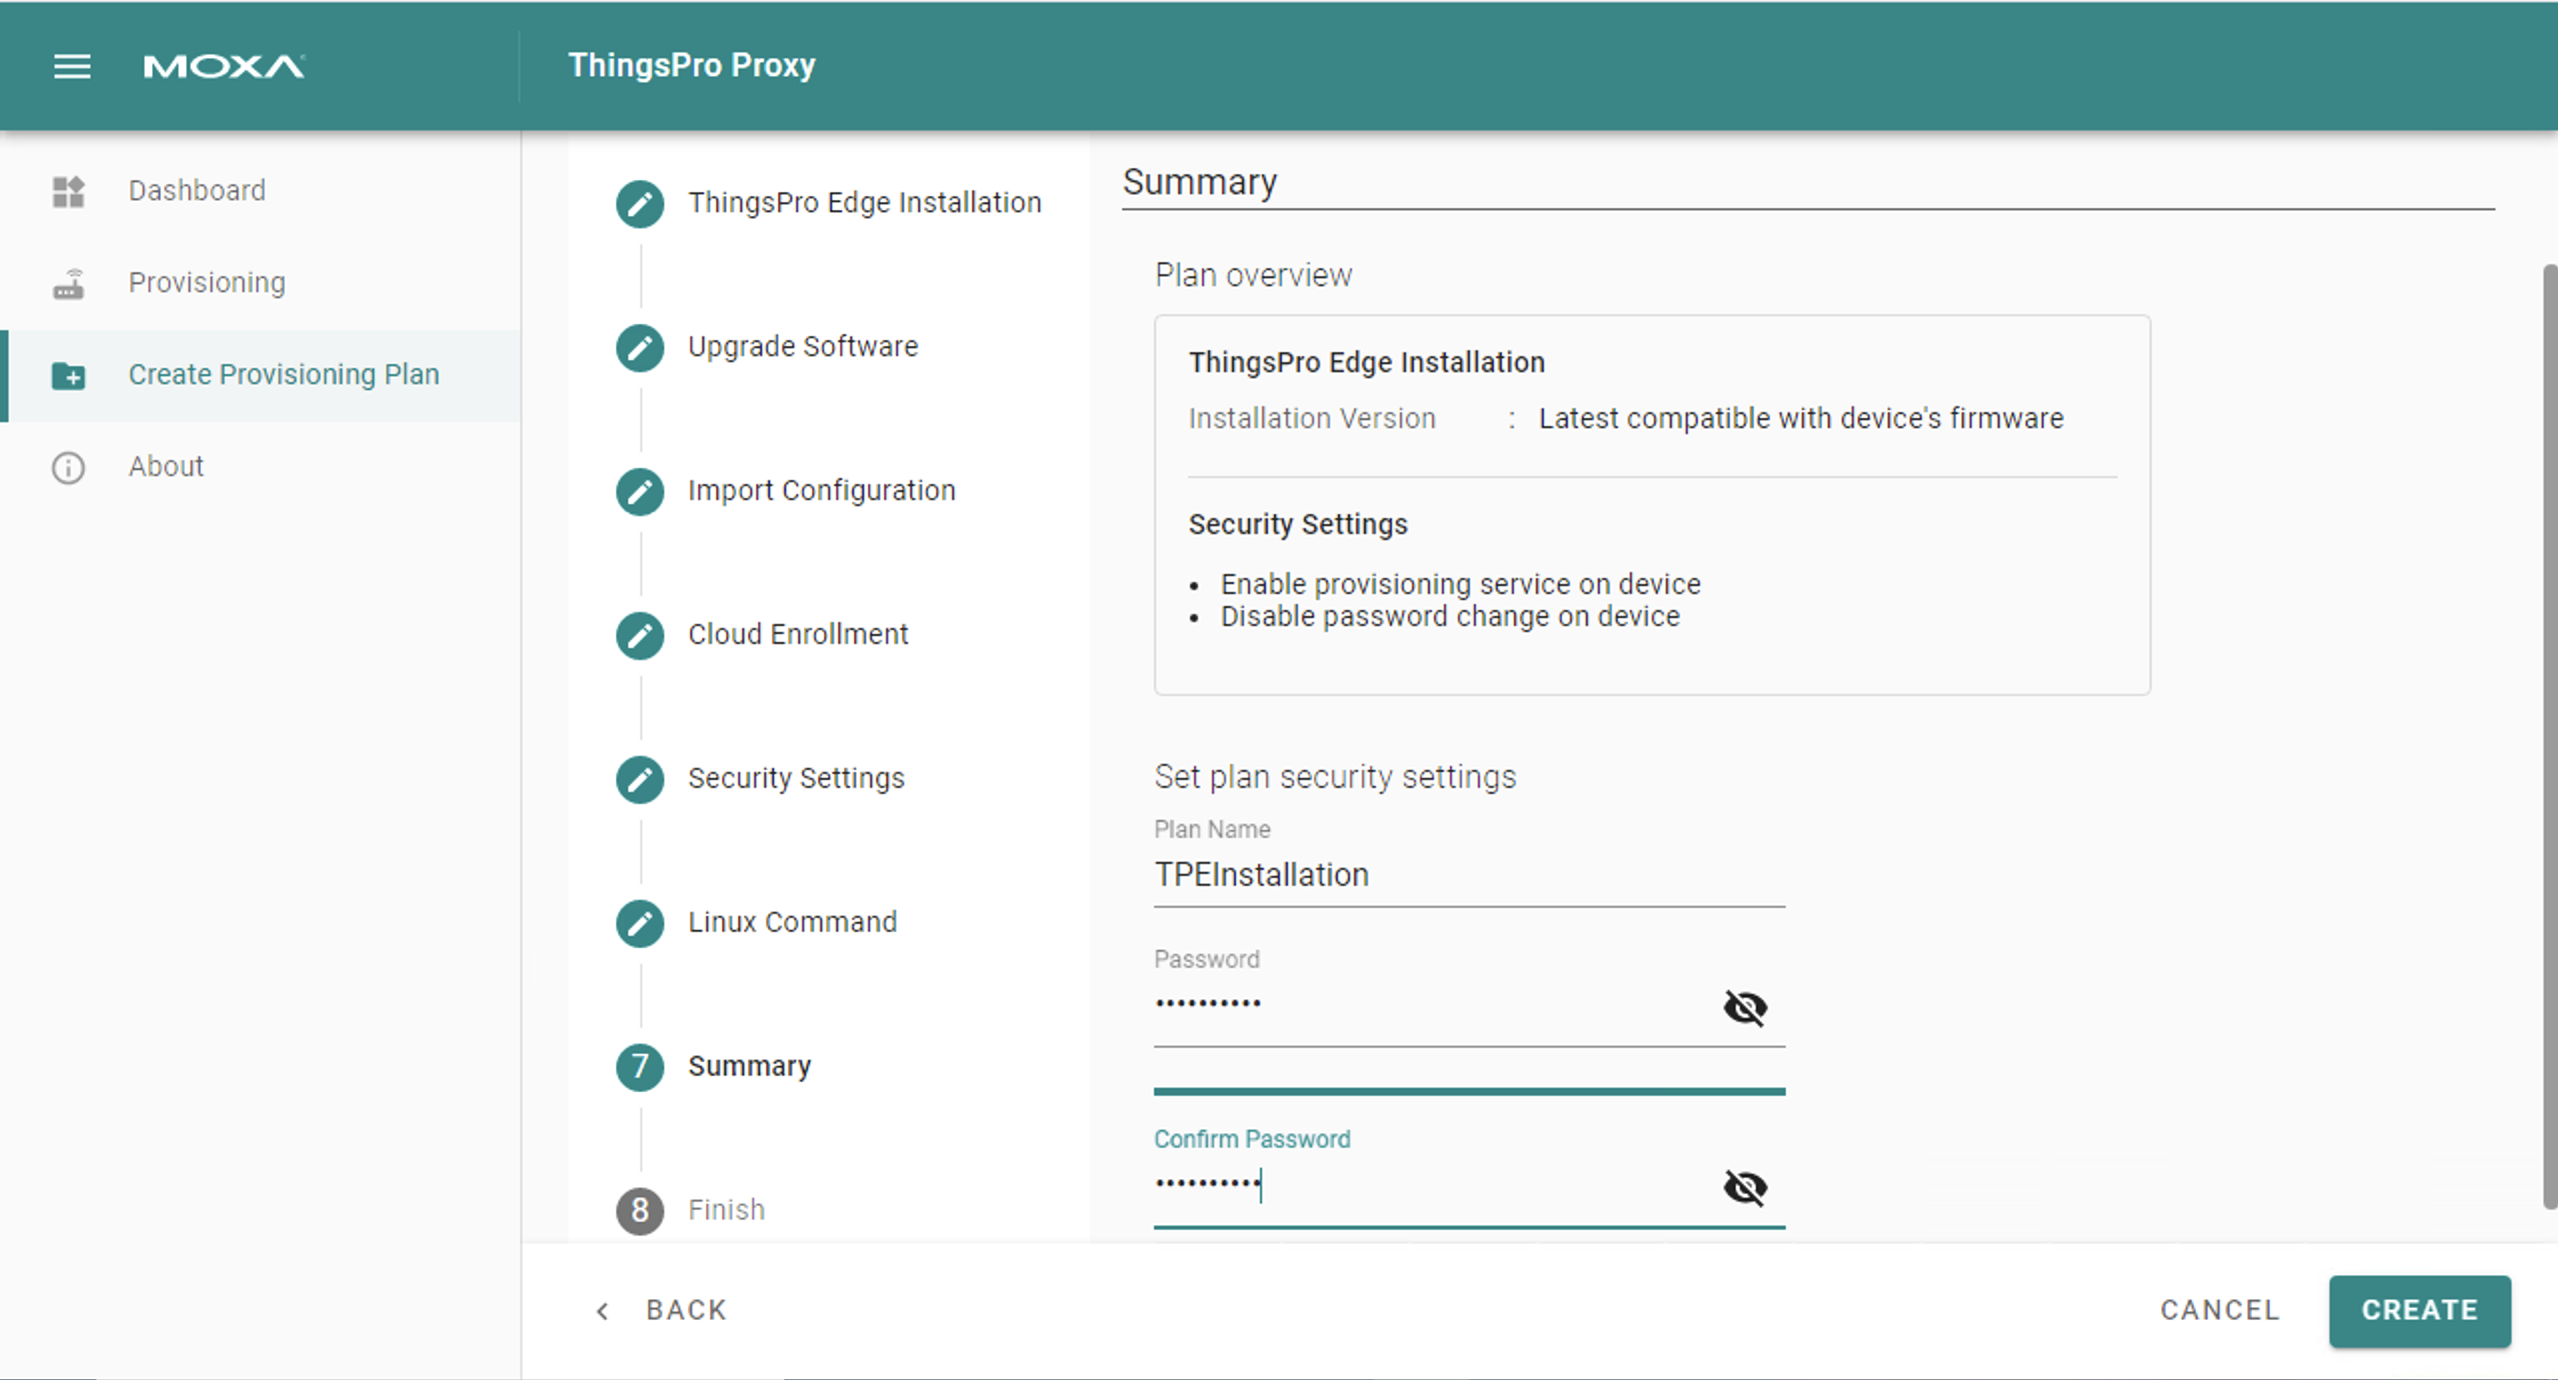
- Specify the ThingsPro Edge (TPE) installation settings and click NEXT.

- (optional) Specify additional settings in the provisioning plan.
- In the Summary, specify a plan name, assign a password, and click CREATE.
The password is used to encrypt the plan and then decrypt it before importing the plan.
- Click DOWNLOAD & FINISH to download the plan. The plan will be downloaded as a *.zip file.

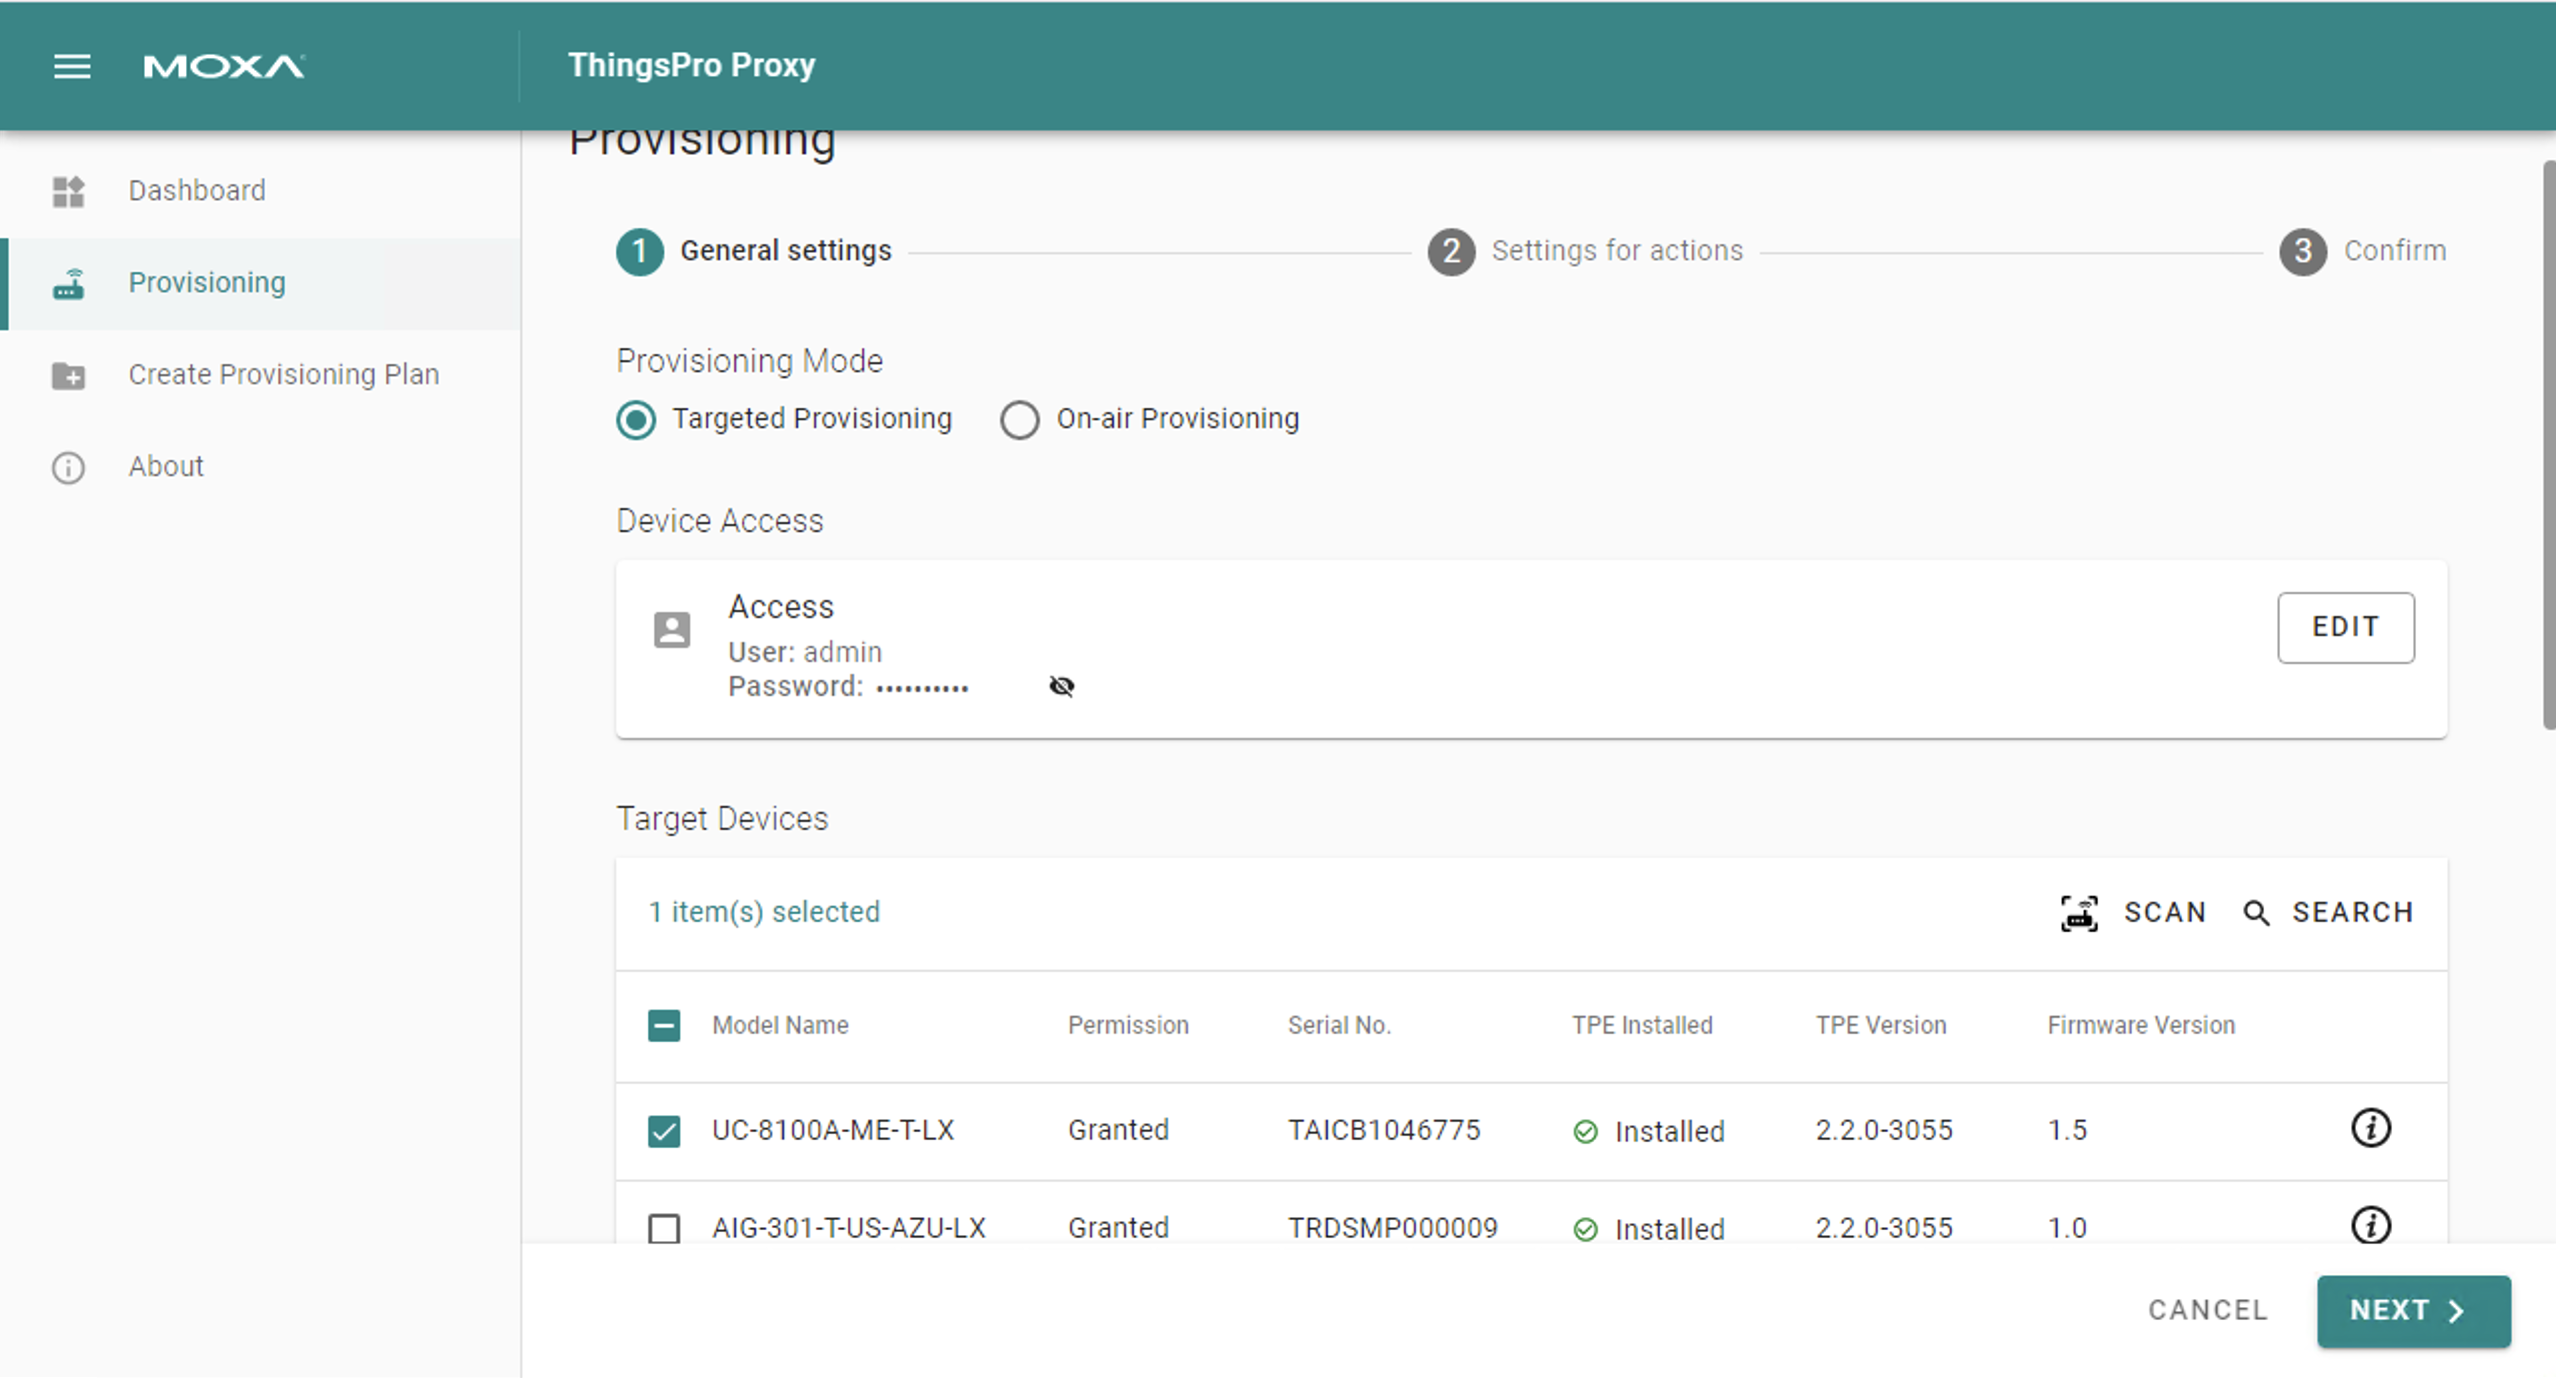
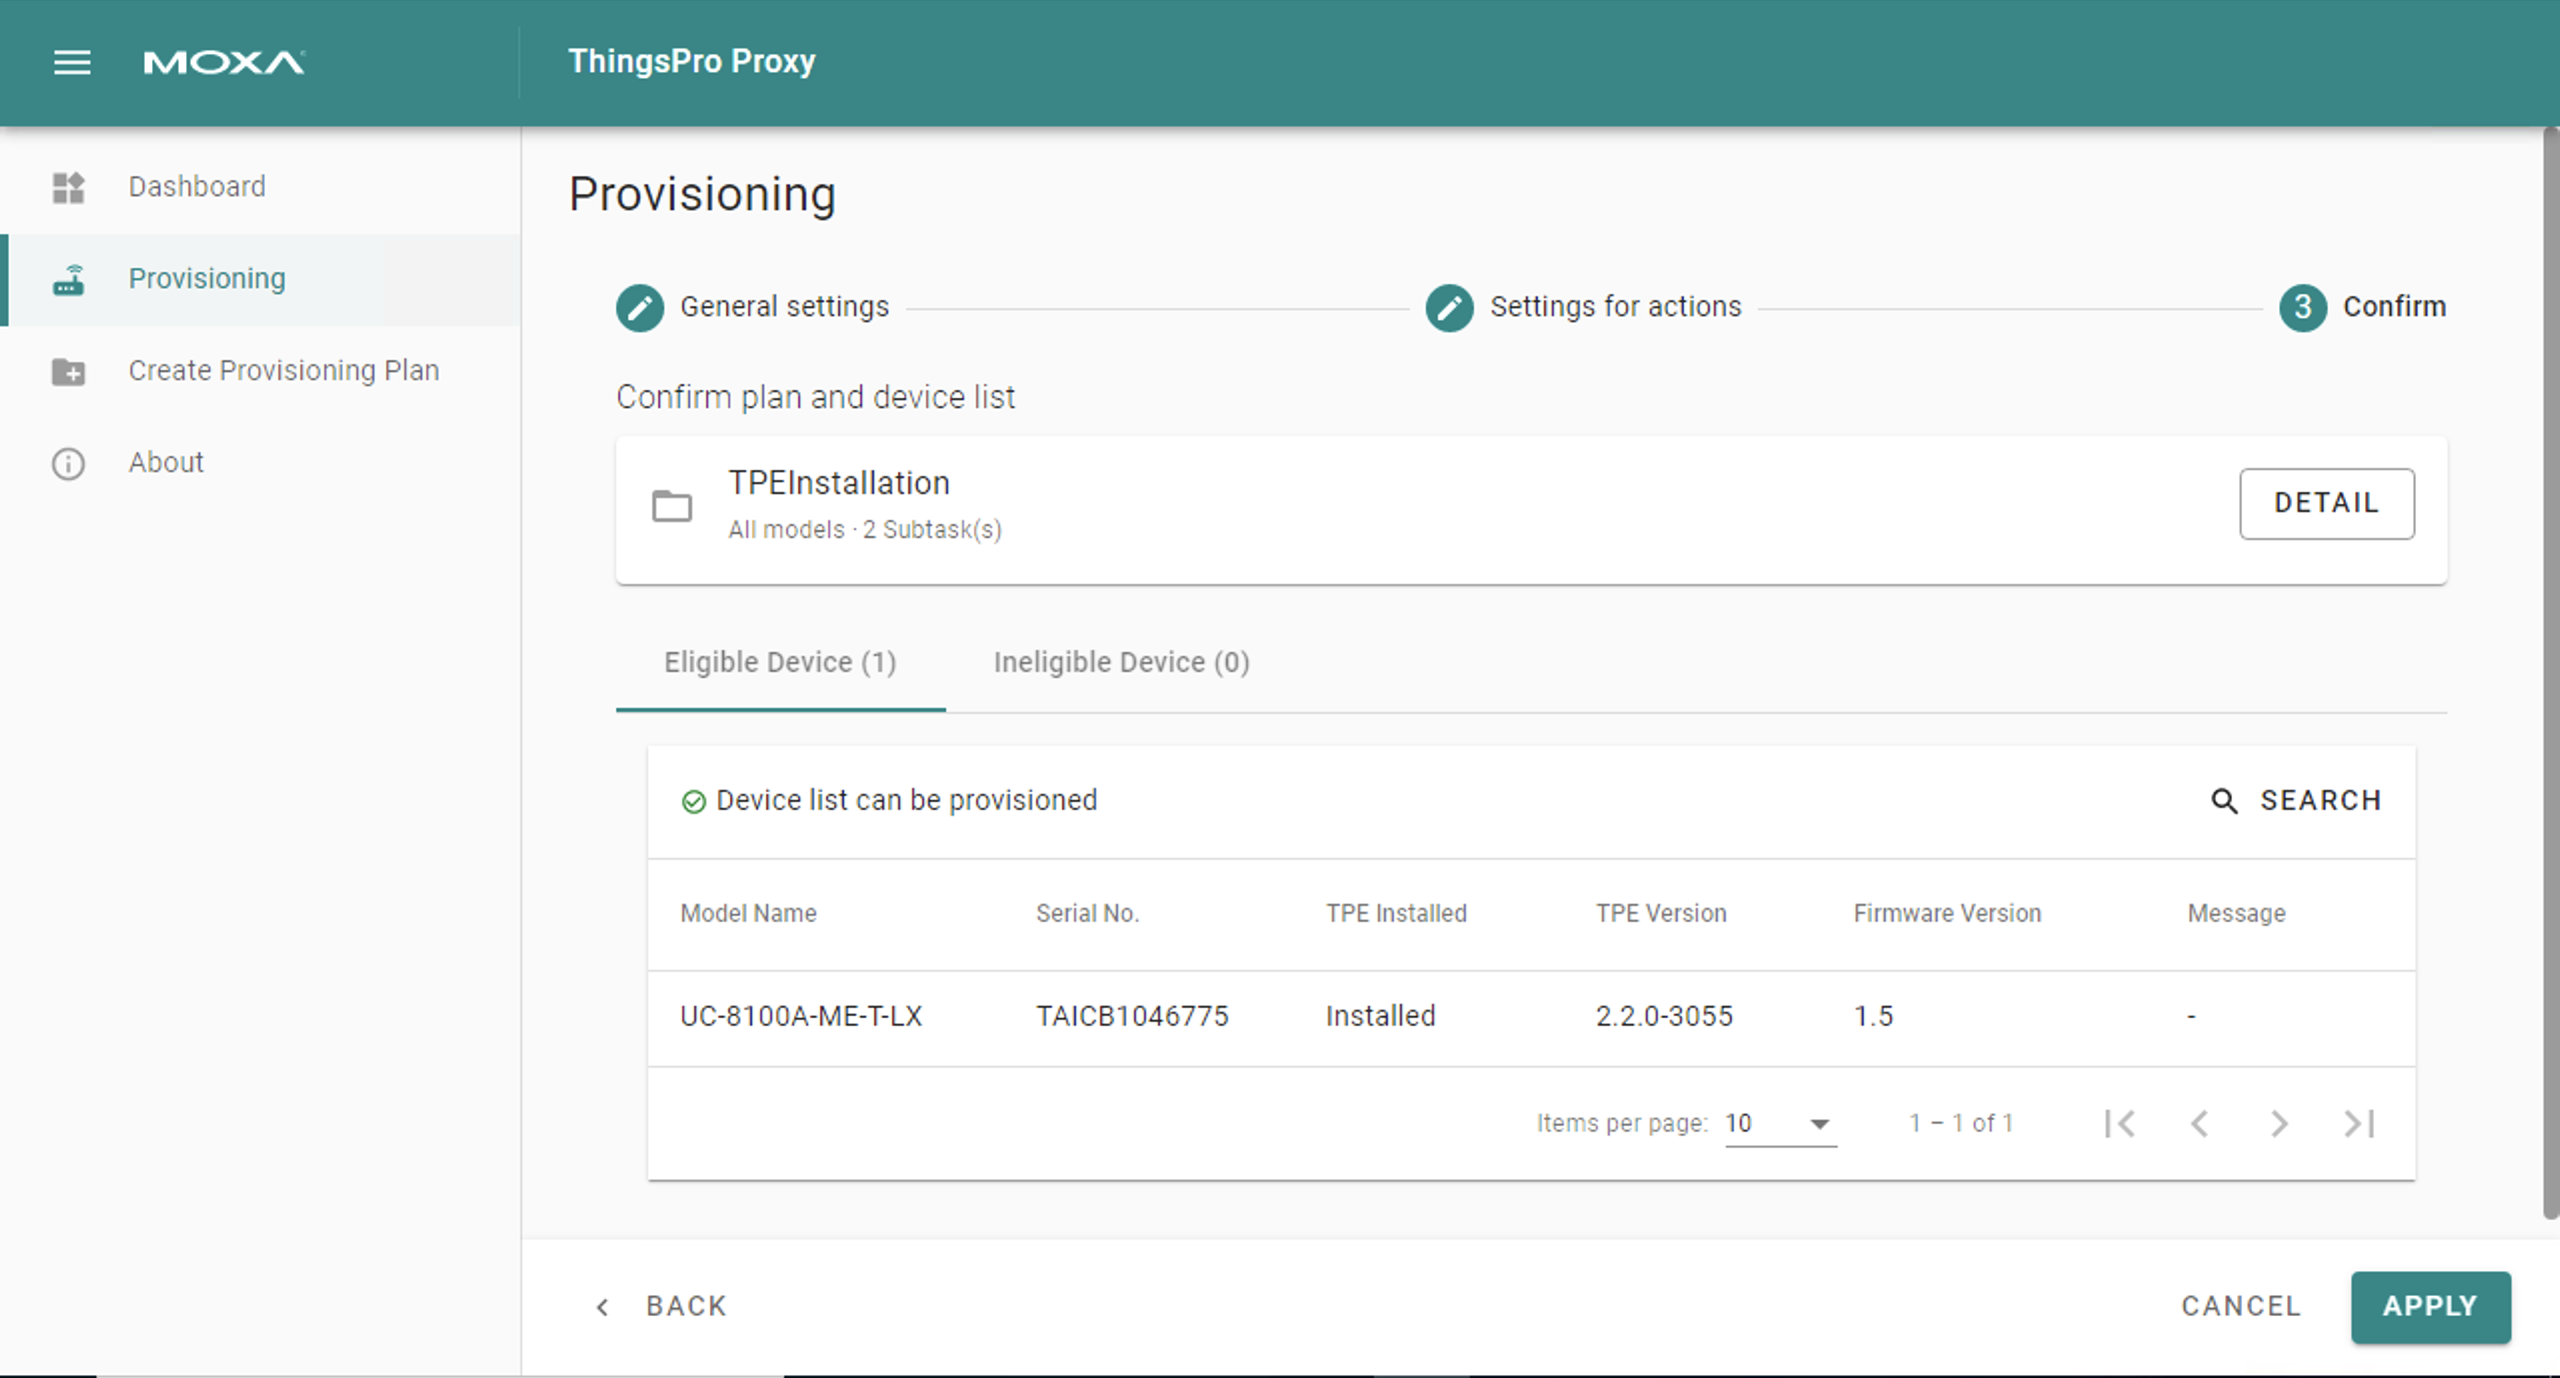
- Click on the Provisioning link.
- Choose the type Targeted Provisioning or On-air Provisioning and click SCAN.
- Select the devices to discover or press SCAN to re-scan the LAN and click NEXT.
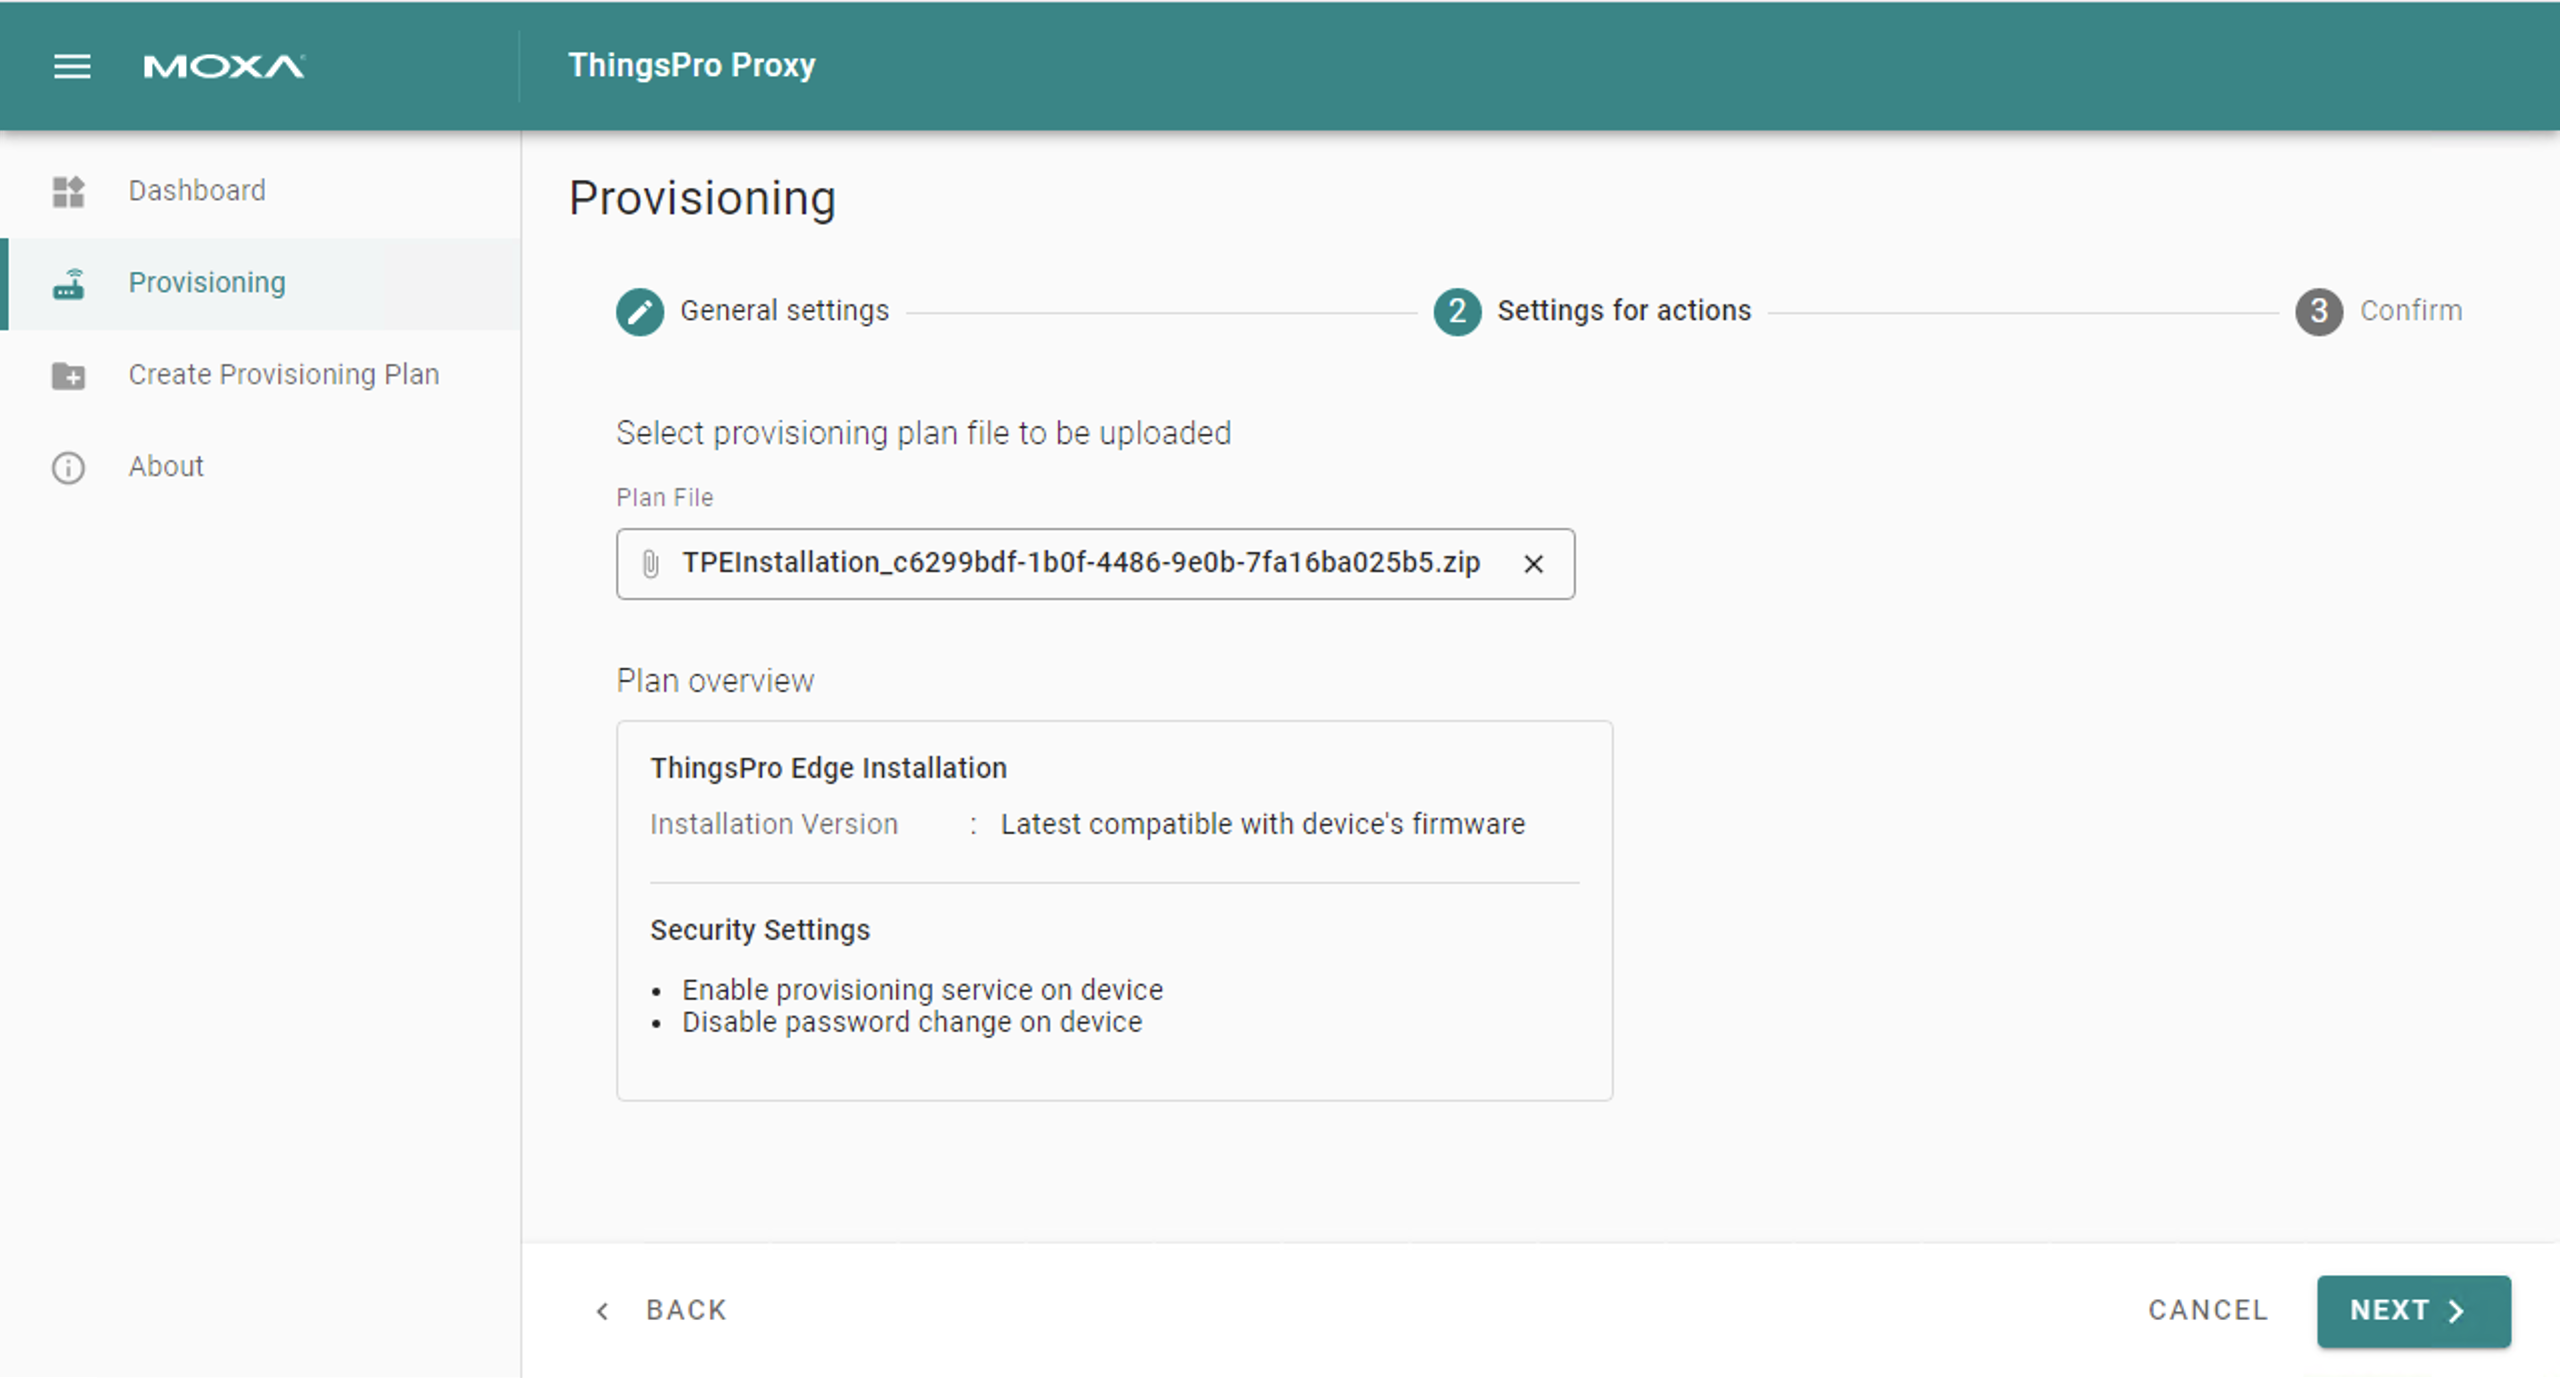
- Press BROWSE... to select a plan, enter the associated password, and click NEXT.
- Click APPLY.
Last updated on 2022-05-31 by Aeluin Chen (陳映攸)