System Settings
Configuring the IP Addresses of Interfaces
Go to System Settings > IP Address to view and configure the IP addresses of the Ethernet and Wi-Fi interfaces.
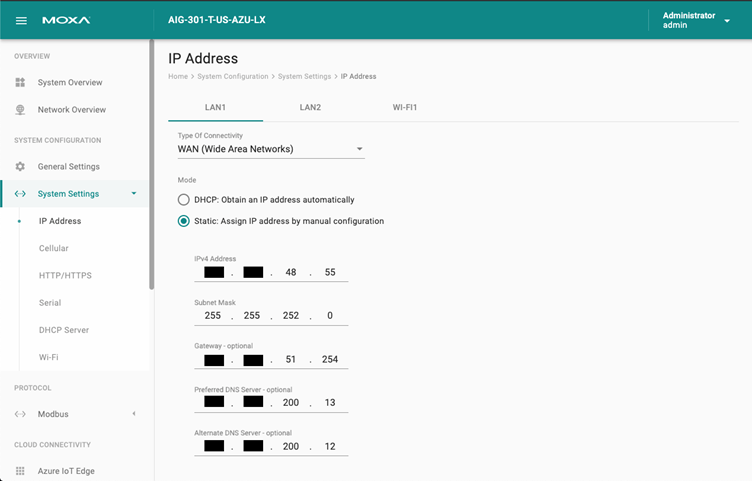
LAN1
- WAN Interface (default): WAN interface with the DHCP client enabled
- LAN Interface
LAN2: LAN interface with static IP (default)
- IP Address : 192.168.4.127
- Subnet Mask: 255.255.255.0
Note: The default route priority: Wi-Fi -> Cellular -> Ethernet.
Configuring Cellular Settings
Go to System Settings > Cellular to view the current cellular settings. You can enable/disable cellular connectivity on your device, create profiles, manage Profile Settings, and enable/disable the connection Keep-alive function to optimize the cellular connection.
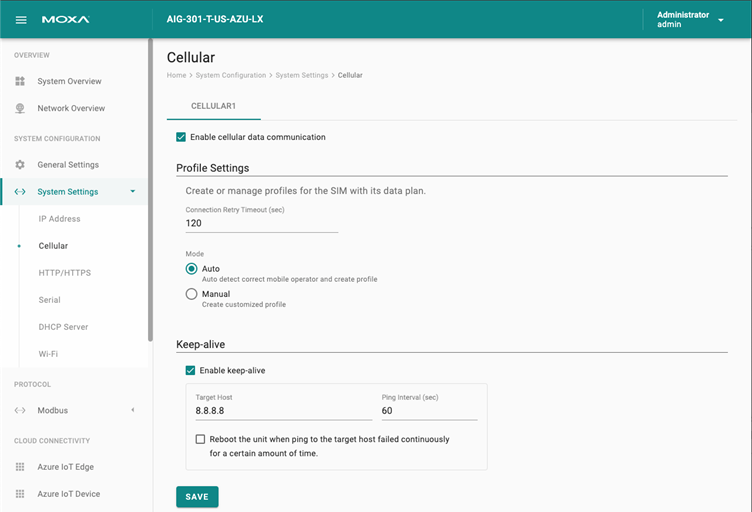
You can create customized cellular profiles by choosing the Manual option in the Profile Settings section. A list of all the profiles in the system is displayed. Create, Edit, or Delete cellular profiles here. You can also configure the Keep-alive function that will help maintain the connection between your device and the carrier service by pinging a specified host on the Internet at periodic intervals.
To create a new cellular connection profile, do the following:
- Click + CREATE.
- Specify a unique Profile Name.
- Specify the target SIM card.
- Enter the PIN Code, if your SIM card requires it. NOTE: Three wrong attempts will lock the SIM card.
- Choose a Carrier. (NOTE: This option is displayed only if the cellular module supports carrier switching.)
- Select Static or Dynamic APN and configure the corresponding settings. Refer to instructions from your cellular carrier to configure the settings.
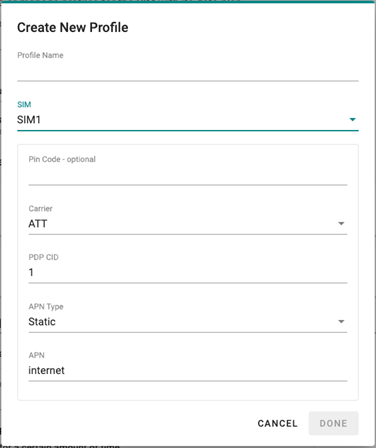
- Click DONE.
- On the Cellular setting page, click SAVE. NOTE: When you click SAVE, the cellar module is restarted and the changes are applied. The settings will take effect after the cellular module is successfully initialized.
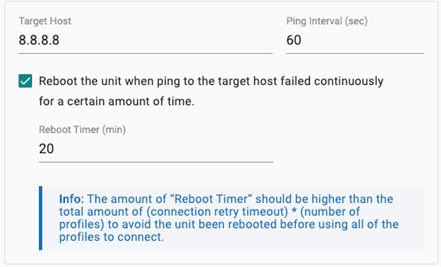
In some circumstances, a system reboot might bring an unstable or malfunctioning device back to normal state. To enable automatic system reboot in these cases, select the Reboot the unit when ping to the target host failed continuously for a certain amount of time option and specify a reboot interval.
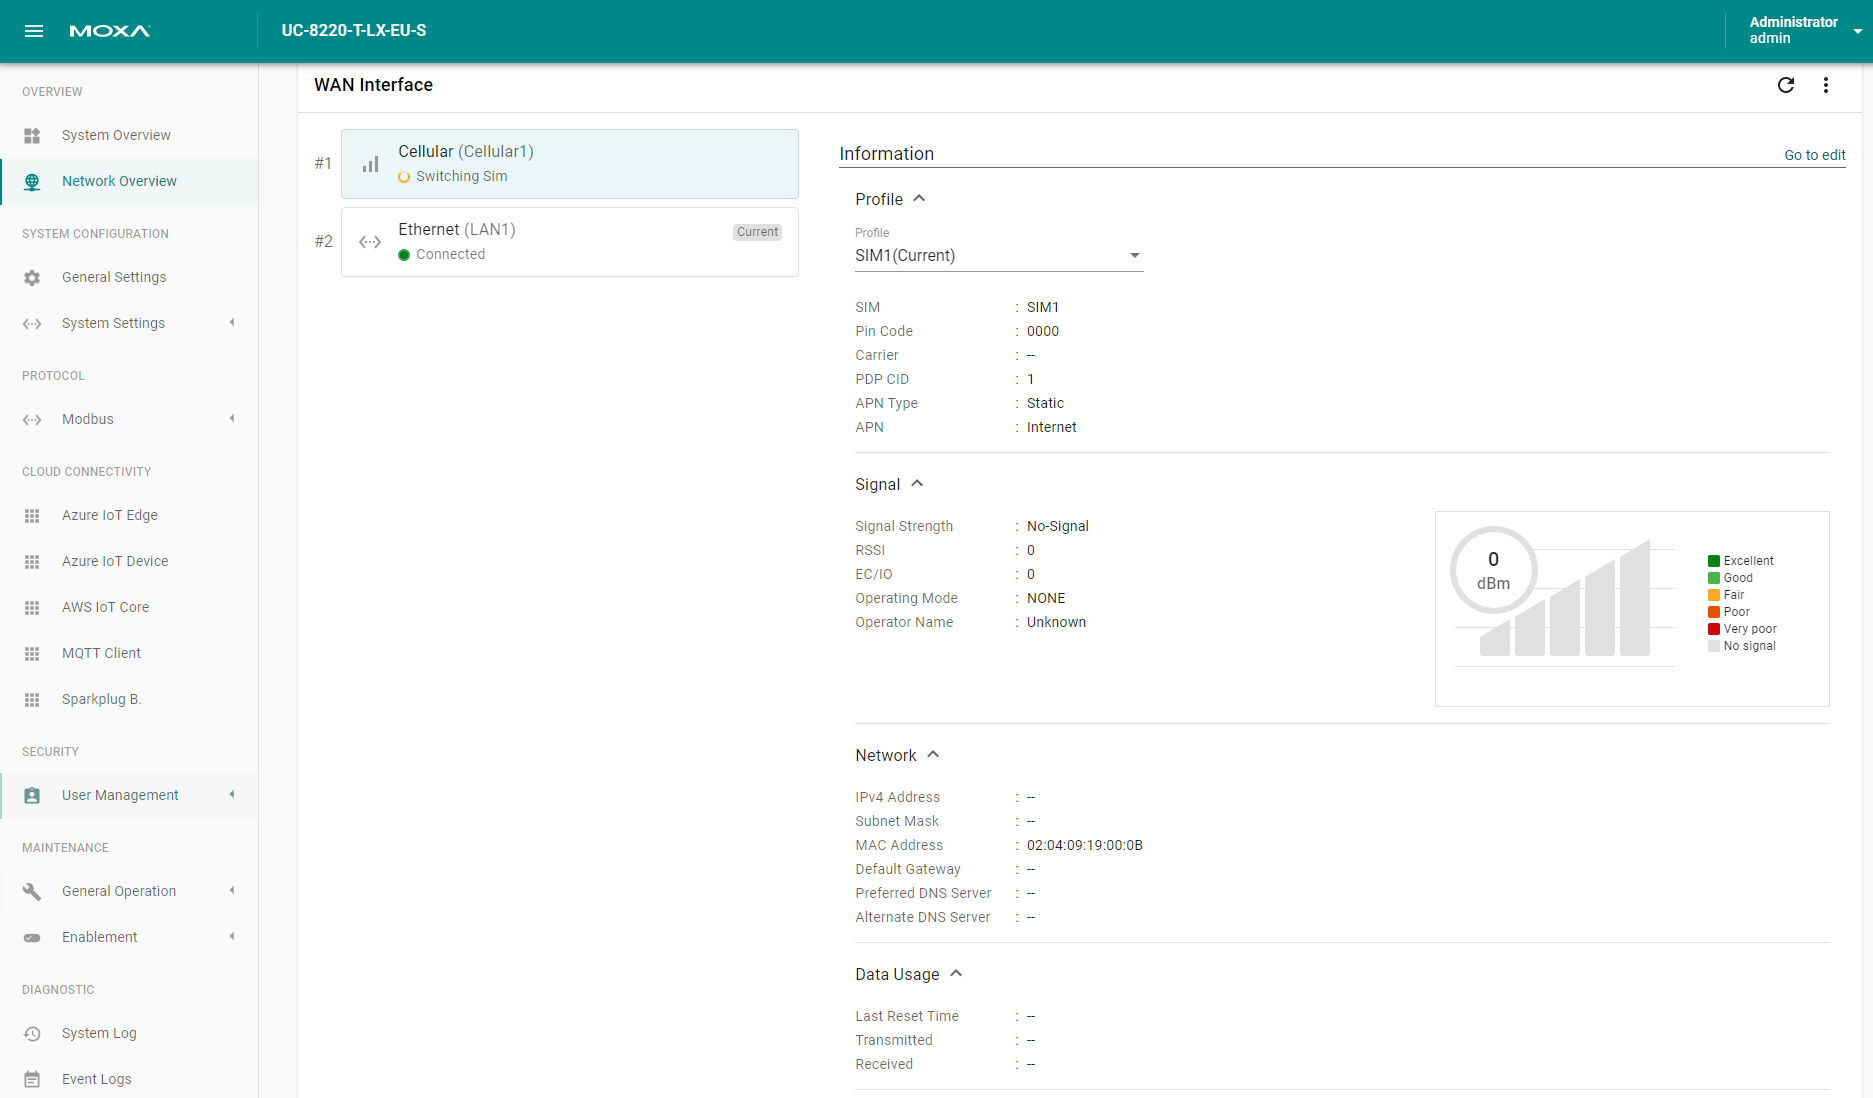
To check the cellular connection status, go to Network Overview > WAN.
Configuring the HTTP/HTTPS Service
Go to System Settings > HTTP/HTTPS to enable/ disable the HTTP and HTTPS services on ThingsPro Edge for specific ports. The default ports for HTTP and HTTPS are 80 and 8443 respectively.
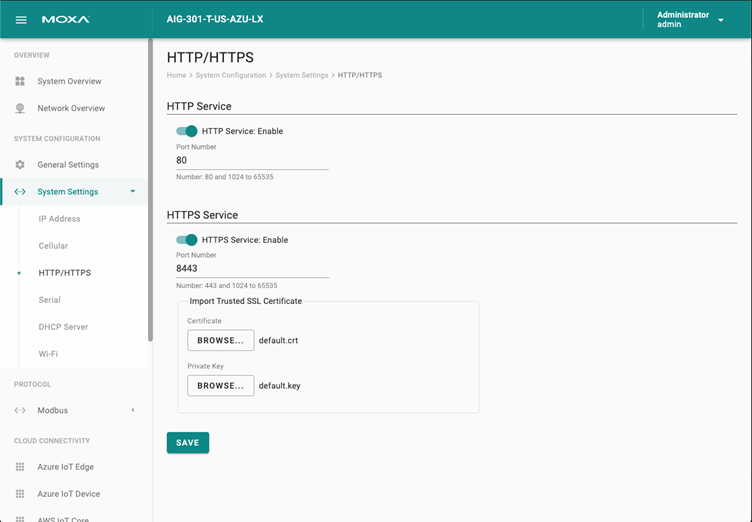
You can import a trusted SSL certificate (with a private key) here to ensure higher security when accessing ThingsPro Edge.
Configuring Serial Ports
Go to Systems Settings > Serial to view all serial ports, change port settings, and to clone a serial port.
To change the settings of a serial port, click on the ![]() icon.
You can modify the Baud Rate, Parity, Data Bits, Stop Bits, and Flow Control, or specify an Alias and assign an interface.
icon.
You can modify the Baud Rate, Parity, Data Bits, Stop Bits, and Flow Control, or specify an Alias and assign an interface.
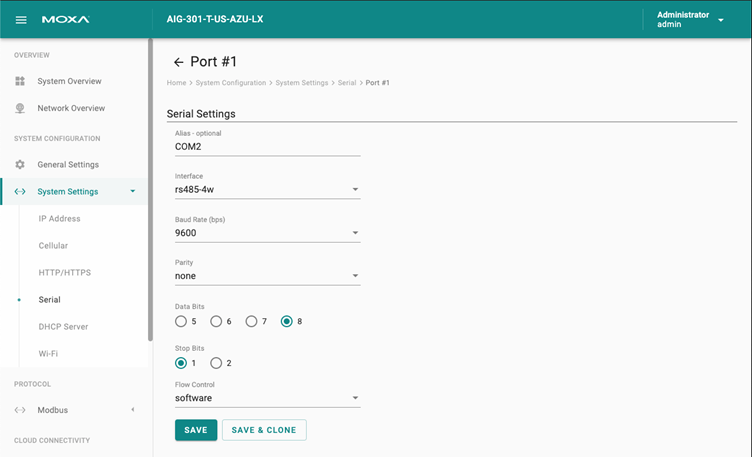
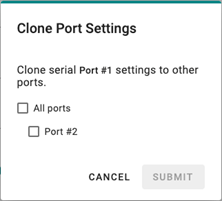
The settings of one serial port can be cloned and applied to other serial ports using SAVE & CLONE.
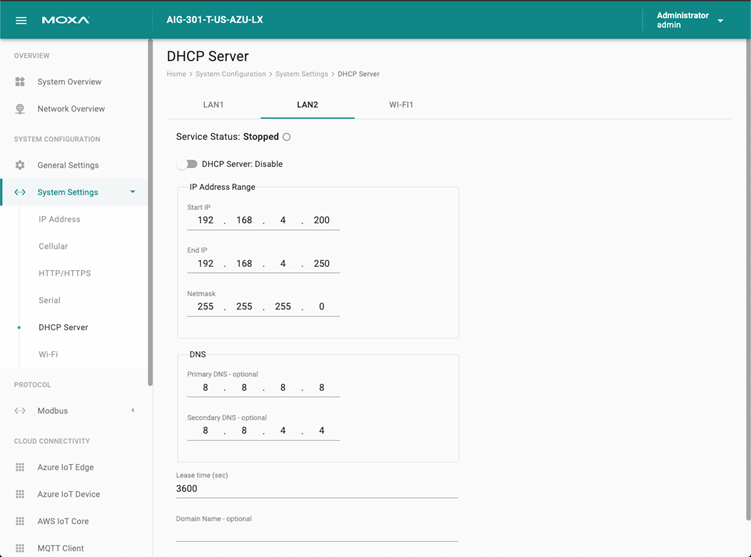
Configuring the DHCP Server
Go to System Settings > DHCP Server to view the DHCP settings.
NOTE The DHCP service is only available on LAN and static IP interfaces.
Configuring the Wi-Fi Interface
Go to System Settings > Wi-Fi to enable/disable the Wi-Fi interface for the Client or AP mode.
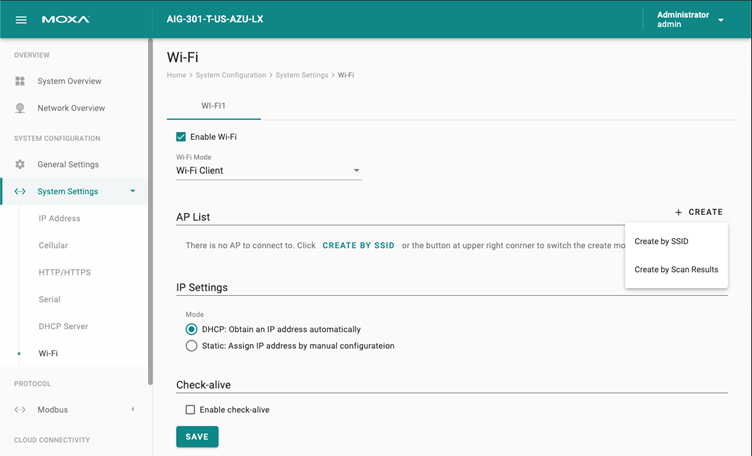
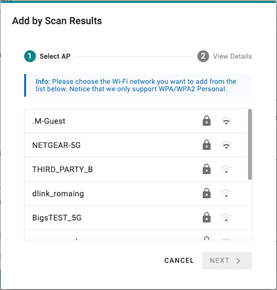
To configure a Wi-Fi client, you need to connect to an access point (AP). Add an AP by clicking on + CREATE and select Create by SSID or Created by Scan Results.

The Check-alive function can be used to ensure Internet connectivity. You can specify a target host and ping interval (sec) here.
To configure a Wi-Fi AP mode, do the following:
- Specify an SSID.
Note: You can also choose to broadcast the SSID.
- Specify a password for the connection.
- Select a Wi-Fi band.
- Select a region and channel.
- Click SAVE.

The maximum number of Wi-Fi clients allowed is 2.
The Wi-Fi AP mode servers as a dedicated troubleshooting feature, enabling users to conveniently access the web console or SSH for diagnostic purposes.
To configure an IP address for the Wi-Fi interface, go to System Settings > IP Address > Wi-Fi.
To enable the DHCP Server service for the Wi-Fi AP mode, go to System Settings > DHCP Server > Wi-Fi.
To check the status of the Wi-Fi network, go to Network Overview > WAN.
Last updated on 2023-09-15 by jamescw.kao