Azure IoT Edge
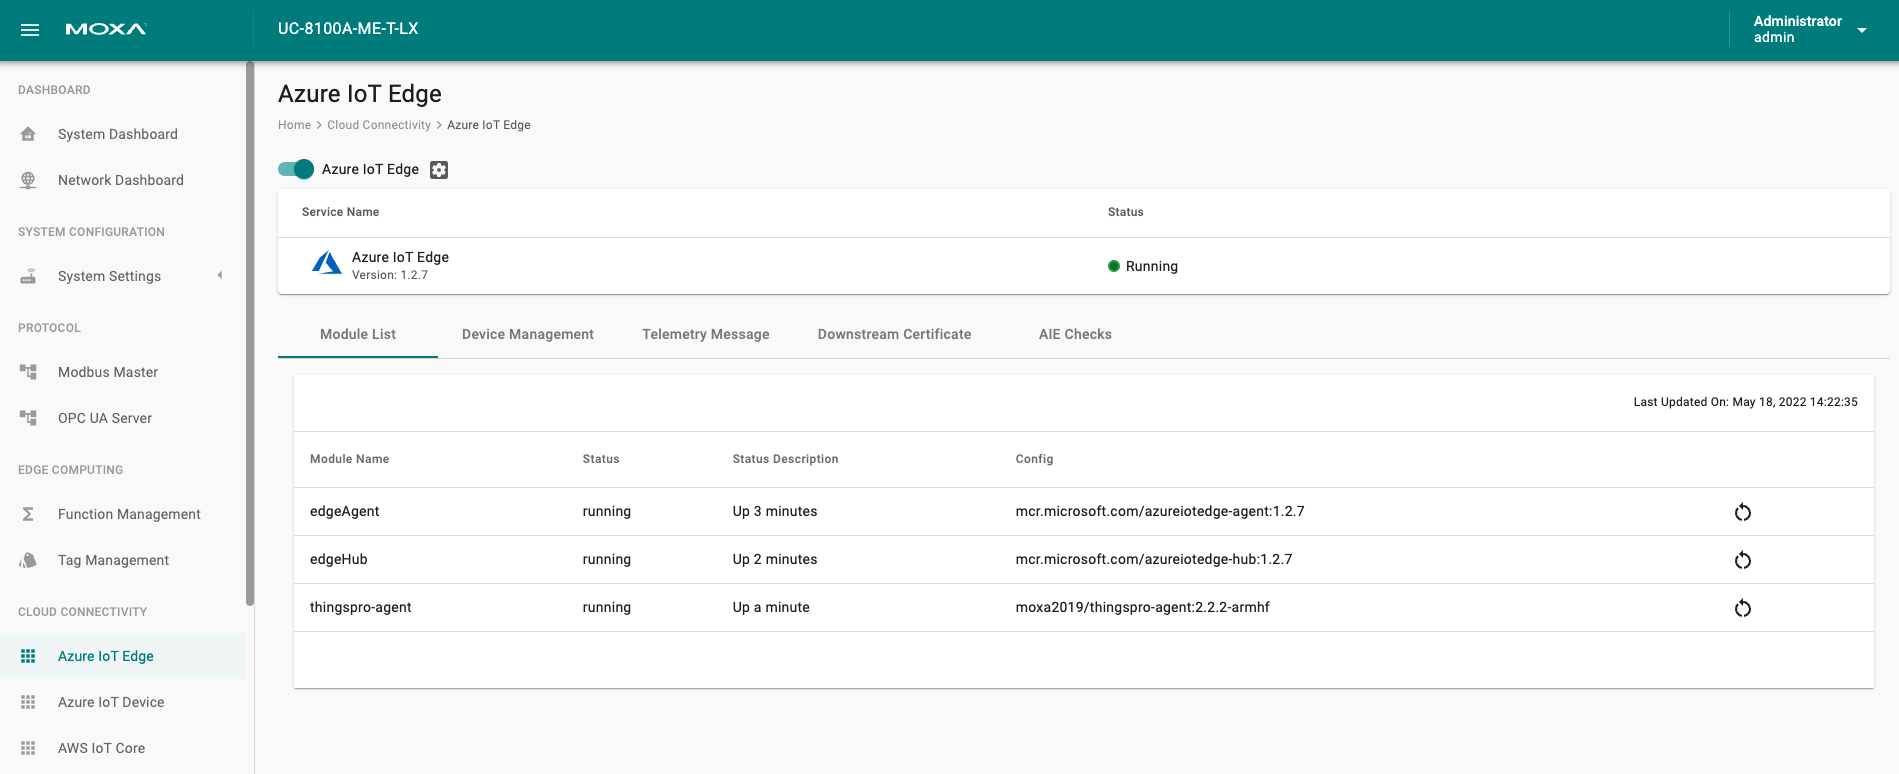
Go to Cloud Connectivity > Azure IoT Edge to configure the Azure IoT Edge settings. You can enable/disable the Azure IoT Edge service and enroll the device via manual setting or DPS (Device Provisioning Service) here.
Note: A registered Azure account is needed to manage the Azure IoT Edge service for your IoT application.
To manually create an Azure IoT Edge connection for your device, do the following:
Enable the Azure IoT Edge service and click on
 .
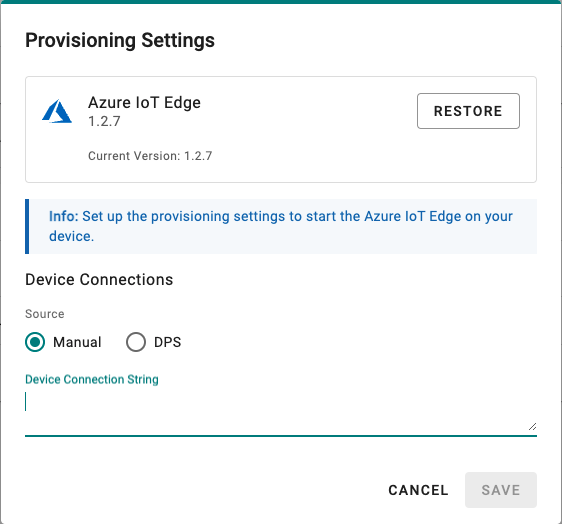
.Select Manual.
Enter the Device Connection String.
Copy and paste the string from the Azure IoT Hub.
Click SUBMIT.
To create an Azure IoT Edge connection for your device via DPS, do the following:
- Enable the Azure IoT Edge service and click on .
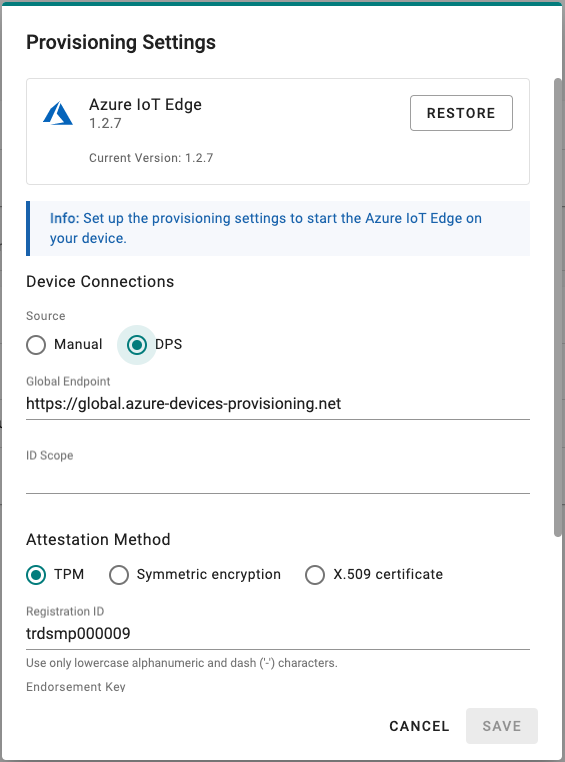
- Select DPS.
- Select TPM, Symmetric encryption, or X.509 certificate
Select an option based on your device registered with the Azure IoT Hub.
Note: TPM attestation is only available for devices with a built-in TPM module.
- For the Azure IoT Hub device provisioning service and Symmetric encryption. enter the Registration ID and Endorsement Key.
- For X.509, upload the X.509 Certificate and Private Key.
- Click SUBMIT.
More information about the Azure DPS configuration in the Azure IoT Hub, is available at Set up a DPS.
If you want to check the Azure IoT Edge configuration and connectivity for common issues, go to Azure IoT Edge > AIE Checks and click CHECK. ThingsPro Edge provides a result after checking for issues. For additional informatin on AIE Checks, see https://github.com/Azure/iotedge/blob/master/doc/troubleshoot-checks.md
We recommend fixing the edgeAgent and edgeHub modules to version
1.2.7from the Azure IoT Hub when using Azure IoT Edge on ThingsPro Edge 2.3.0.
If an unexpected situation occurs when you upgrade/downgrade to a certain version of Azure IoT Edge, you can restore Azure IoT Edge by clicking RESTORE in the Provisioning Settings. Using the restore function will remove existing settings including Message Group, Store and Forward, Device Management, and Downstream/Upstream credentials.
Telemetry Message Settings
The simplest message type for sending IoT device data to your IIoT applications is a telemetry message. To create a telemetry message, do the following:
Note: You will need to install the ThingsPro Agent to send telemetry messages. For additonal information, see ThingsProAgent
To configure the telemety message settings, do the following:
- Go to Cloud Connectivity > Azure IoT Edge and click on the Telemetry Message tab.
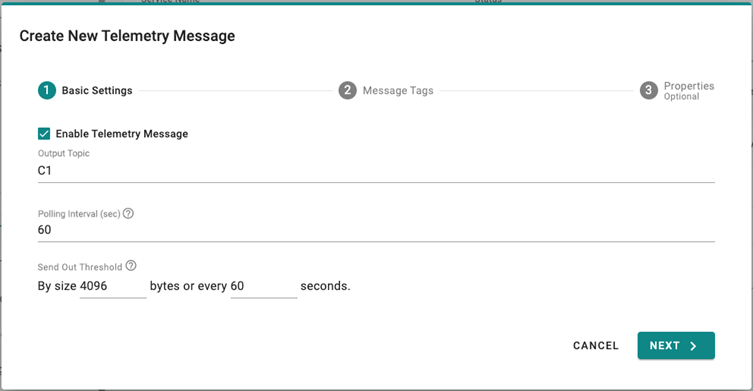
- Enable the Telemetry message service.
- Specify an Output Topic name.
- Enter the Polling Interval in seconds.
- Setup a threshold by file size (bytes) or time interval (seconds).
- Click NEXT.
- Select device tags from providers (e.g., Modbus Master).
- (optional) Enable custom payload by using the jq filter.
- Click NEXT.
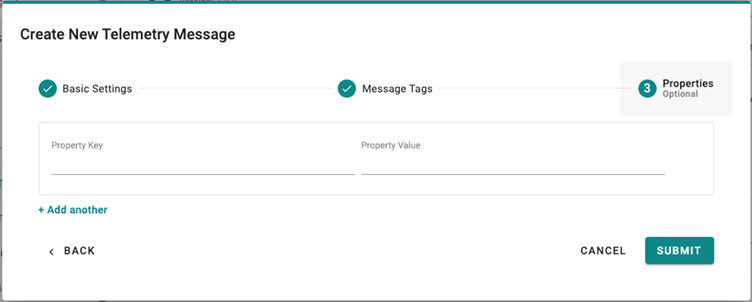
- (optional) Enter Property Key and Value.
- Click SUBMIT.
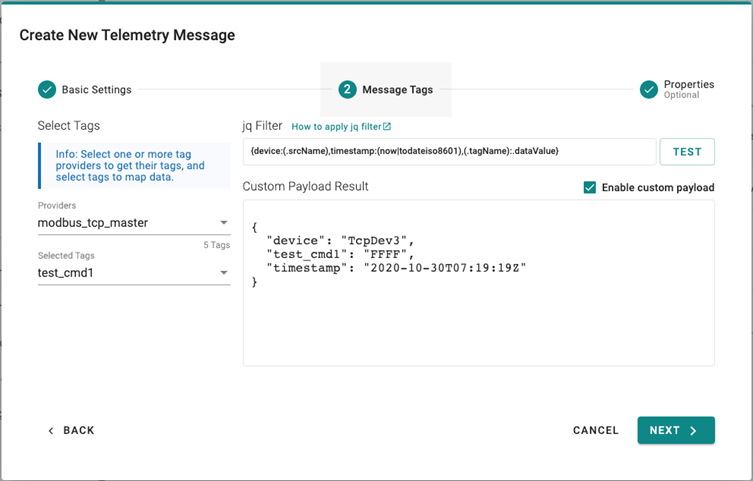
The Device-to-Cloud (D2C) message policy allows you to transform default payload to your desired payload schema via the jq filter. For additional information, refer to the jq website at (https://stedolan.github.io/jq/manual/).
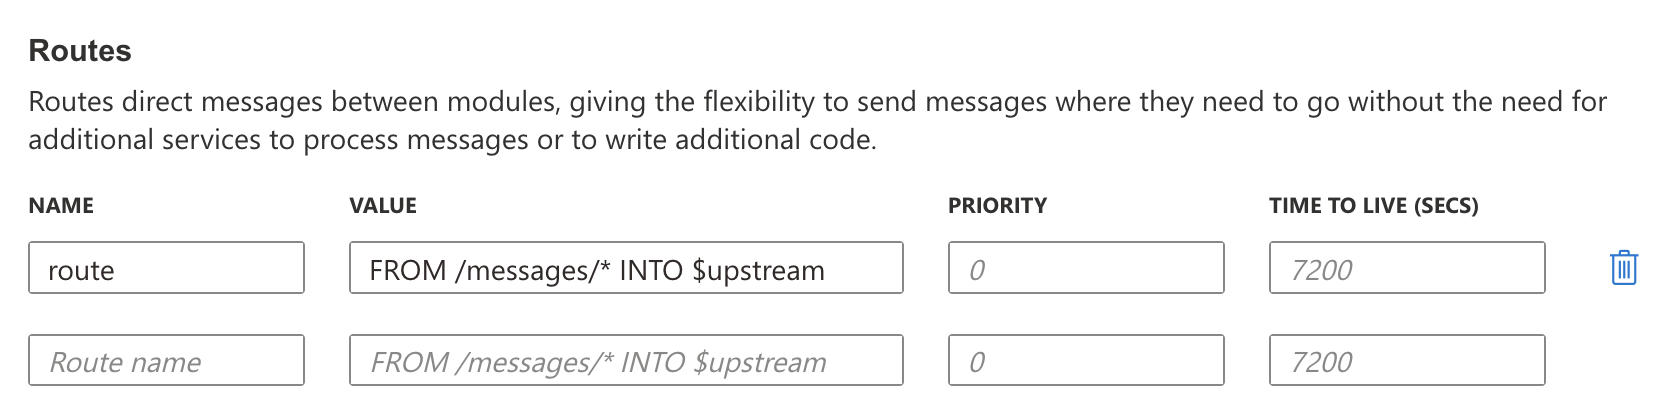
Note that if you cannot receive D2C messages, be sure that a default route of the modules is added. You can add routes in Azure IoT Hub. Log in your IoT Hub > IoT Edge > choose a device > Set modules > Routes.
Device Management Settings
Go to Cloud Connectivity > Azure IoT Edge and click on the Device Management tab. Enabling this feature allows cloud service providers to manage IoT devices remotely using Device Twin and Direct Method technologies.
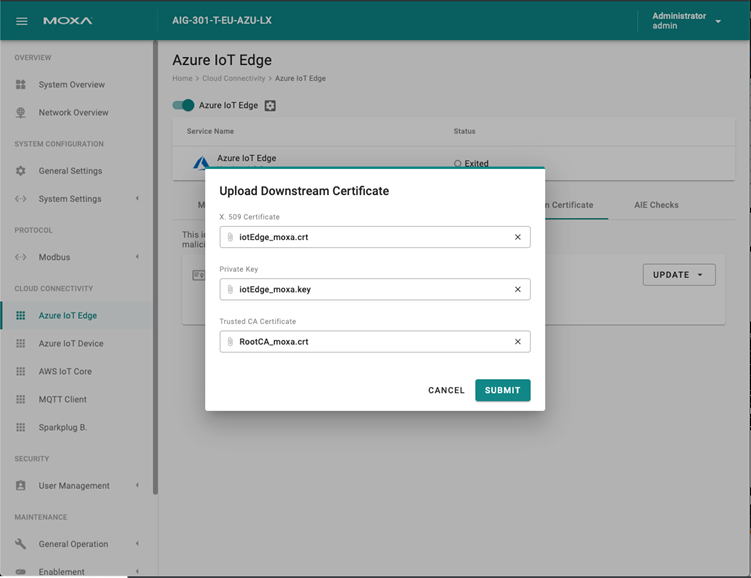
Downstream Certificate
To prevent your device from connecting to potentially malicious gateways (Azure IoT Edge inside), you can upload X.509 certificate, Private Key, or Trusted CA Certificate. You can generate the certificates and the private key using ThingsPro Edge. For additional information, see Downastream Certificate.
Known Issues
- Azure/iotedge/issues/5773: Verify the EdgeDeviceHostName parameter value matches the config.toml hostname setting. If it doesn't match, the edgeHub container was running when you modified and applied the configuration. To update the EdgeDeviceHostName, remove the edgeAgent container. ```bash sudo docker rm -f edgeAgent ``` The edgeAgent and edgeHub containers are recreated and started within a few minutes. Once edgeHub container is running, inspect the container and verify the EdgeDeviceHostName parameter matches the configuration file. > Microsoft Documents
Last updated on 2022-08-18 by JamesCW Kao